Create a Notifier Transport in Symfony
📚 The Notifier is a “new” component that was introduced in Symfony 5.0, the documentation said:
The notifier component can send notifications to different channels. Each channel can integrate with different providers (e.g. Slack or Twilio SMS) by using transports.
It’ very easy to use, you create a Notification and you pass it to the NotifierInterface::send and behind the scene the message will be send to the good provider.
In this example the message will be send to slack, the second parameter of the Notification (['chat/slack'] ) contains the channel here it’s chat and the provider here it’s slack.
In order to be sent, the Notification need a channel and a provider, the provider is used to transport the message at destination 💌, that means any provider should have a transport class ✈️responsible of calling the API.
🔥 Thanks to the community many providers have been developed and you can send notification to many famous services (Slack, Discord, LinkedIn, Telegram, Teams, Twilio…).
You just have to install the provider, configure credentials and 🚀
BUT suppose you have to send a notification to a private service of your company and you want to use the Notifier, you need to configure your own provider with a specific transport.
In this post I’ll show you how to do this in few steps, let’s start 🏁
1- Create the Transport class
Remember that the Transport class is responsible for calling the API to post the message. The mandatory thing is to implement the Symfony\Component\Notifier\Transport\TransportInterface .
💡I recommand to extends the Symfony\Component\Notifier\Transport\AbstractTransport it already implements the interface and it’s better as it’s dispatch some events and deal with exception.
2- Configure the chatter and create the Transport Factory
📖 The Factory is responsible to create the Transport class via the resolution of a DSN. We define The DSN in the configuration of the chatter in the “chatter_transports” section inside the notifier.yaml file.
# notifier.yaml
framework:
    notifier:
        chatter_transports:
           userland: '%env(USERLAND_DSN)'
and then we define the value var in the .env file.
# .env
USERLAND_DSN:userland://TOKEN@default?channel=CHANNEL
ℹ️ To keep things simple, our Transport class doesn’t have to pass credentials to call the API so we will not parse the DSN in our example, we will just return the Transport without passing username, password but if you’re curious you can check the linkedin integration to see how the DSN is parsed and how credentials are passed to the LinkedInTransport 👀
In our use case, implements TransportFactoryInterface is enough, but I prefer to extend the AbstractTransportFactory in case you need some extra helpers method for your use case.
Now we have created our TransportFactory we will tell to Symfony to register it 😃
3- Register the factory
This step is necessary to match between the DSN inside the chatter configuration in notifier.yaml and the Factory.
# services.yamlApp\UserlandTransport\UserlandTransportFactory:
    parent: notifier.transport_factory.abstract
    tags: ['chatter.transport_factory']
4- Try it 🚀
To try our stuff I will add a dd inside UserlandTransport::doSend and I’ll access to /onboarding in order to send a notification.
and… 🎥
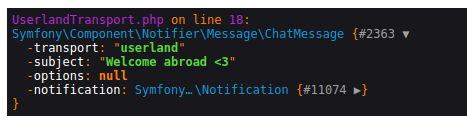
The output means that our transport is well resolved 🎉
💡Note that you can pass the event dispatcher to your Transport in order to dispatch some useful events:
- SendMessageEvent
- SentMessageEvent
- FailedMessageEvent
👋 That’s all, thanks for reading, I hope you liked it.
🔥You can get the source code of the example 👉 here 👈
Don’t forget to give feedback 😊, clap a max 👏and share 📨